Screen printing plays a significant part in the printing business in order to facilitate the users who are aiming to get best printers for screen printing. It involves the printing of materials using a mesh screen. Silk screen printing is another name for screen printing. It includes three main things that carry this whole process.
These include a flat screen, inks, and a squeegee. Screen printing is usually done on fabrics. But wood, metals, and cotton can also be printed.
The main reason for the popularity of screen printing is that it creates designs in various colours. Also, have a look to fix the printer, not printing colour.
Unlike sublimation, it is not limited to only a few colours. Designs of all colours can be printed through this screen printing method.
We will let you know accurately about the screen printing process so that you can quickly start this process on your own without facing any problems.
What do You need for Screen Printing?
How Does Screen Printing Work?
Generally, printing on material surfaces through screen printing is not a very difficult task. It is somehow similar to the sublimation process.
Now, we will tell you about some major steps that are involved in the process.
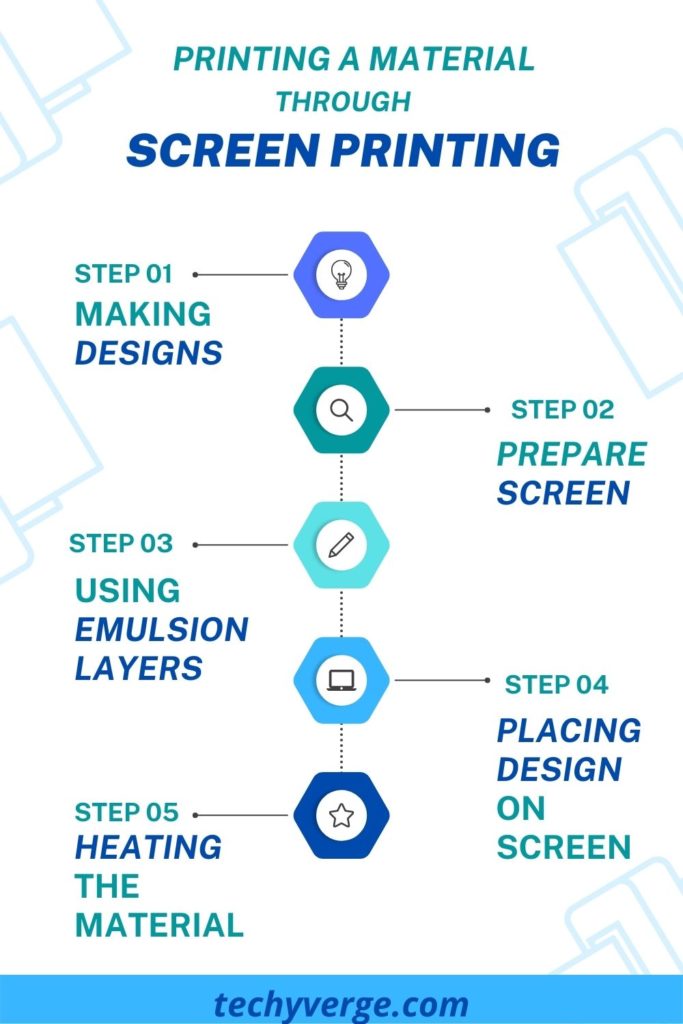
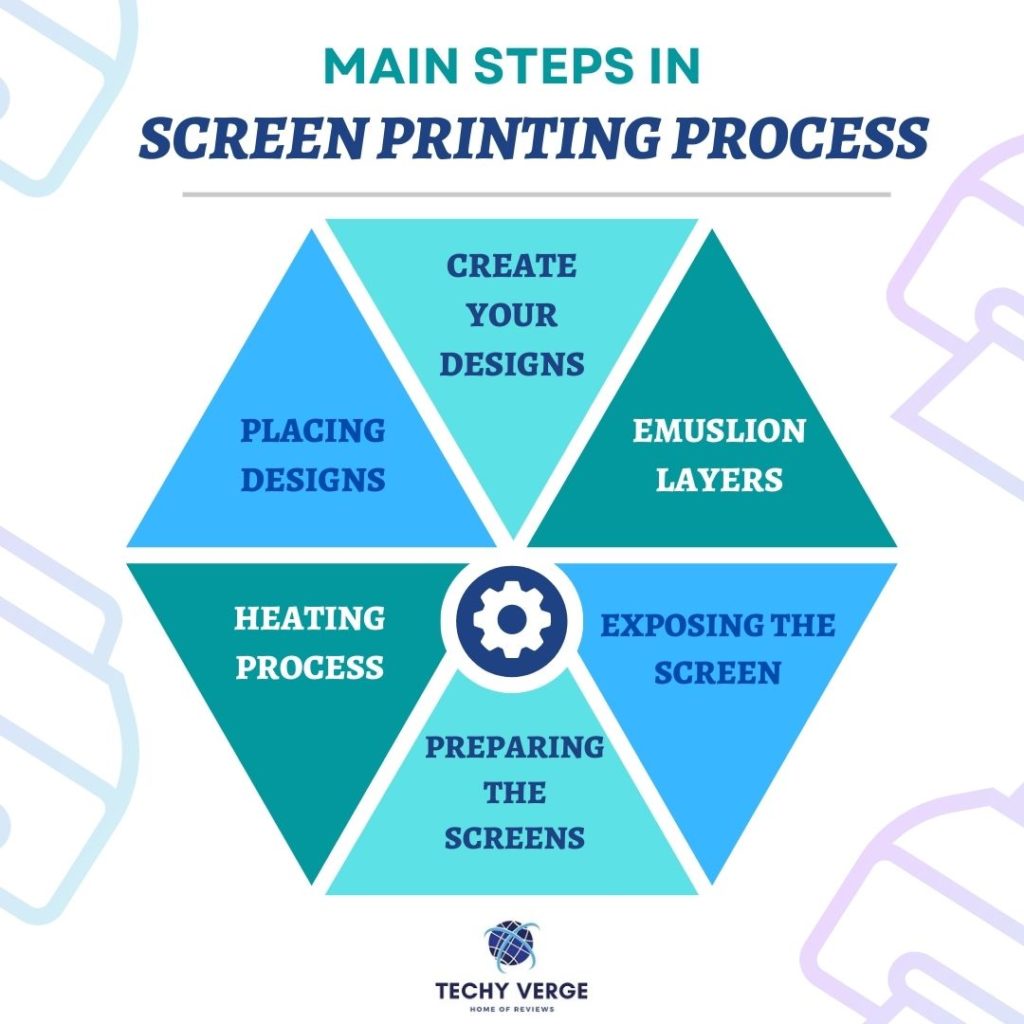
1. Creating Designs
The first primary step in the process is the creation of your designs. You can create any design or image that you like. Either with the use of your hands or with some software programs.
But, once you are sure about the creation of your designs. Understanding its printing is crucial. You must place your design on some material and onto the flat screen.
2. Preparing the Screen
Preparing the screen is the most important step in this list. If you somehow make any mistake here, you can not create any prints.
Once your design is entirely ready, it is time to measure the number of meshes on the screen. A mesh is generally a total number of fibres in a single square inch of your material.
The high mesh count allows ink to move quickly on the material’s surface. As a result, your designs are easily printed through this method.
However, printing can be tricky if your mesh count is relatively low. Before printing, every mesh surface is coated with an emulsion layer.
Main Types of Emulsion
There are 2 types of emulsion layers. These layers allow your design to stand still on the mesh surface. Print them correctly on your materials.
SBQ-based: they are used for extreme quality works. These layers are not mixed with any materials. They are, however, costly, which upsets people.
Diazo: this type of layer is pretty affordable. They can be used for longer exposure for printing the best quality designs.
Use the Emulsion Layers
Your designs are placed on the mesh screen coated with these layers for printing your images or designs. This takes place in the presence of intense, bright light.
In this process, we use a bright light to harden the emulsion coatings over the screen.
This prevents the flat screen from getting any damage. Moreover, it supports your print at a high rate.
The only major thing to remember in this step is multiple screens. This is because the designs may use more than one colour.
Consequently, the user can become confused by all the colours on one screen. In this case, multiple screens will be more effective.
3. Exposition of the Screen
When the emulsion layers on your screen are hardened, the chance for the best printouts increases. Therefore, we must expose our whole mesh screen to robust and bright light.
It allows all the soft parts of your screen to harden up. As a result, your design is easily shifted from the flat screen to the surface of your material.
If, somehow, some parts of your screen do not get hard in this process, then do not worry. The printer is also responsible for controlling this feature.
4. Placing the Design
A print board is placed just below the screen with the material to be printed on it. Now, it is time to put your design on the mesh screen.
A squeegee will be used in this step, along with the ink. The ink used in this process will be according to the design of your image.
The squeegee will be the primary source for you to distribute your genuine ink on the screen. This ink will be forced to move through the glass onto the below material.
As a result, your design will be printed on your material’s surface. But, this process is not finished here; it has one last important step remaining.
5. Heating the Material
The last step in this screen printing process is heating the material. The dryer is an easy way to do it. This leaves you with the best quality, smooth print.
Frequently Asked Questions:
What is the best type of screen printing?
Grayscale printing is known as the best type of screen printing. This process generally results in images of high quality, which are output.
Why is screen printing better than sublimation?
It involves printing every colour material. On the other hand, sublimation only allows you to sublimate to light-coloured materials.
Is screen printing a complicated process?
No, it is the easiest method in any printing process. The reason for its extended use is that it has proven to be effective over the years.
List of all the steps involved in Screen Printing:
Final Statement:
Now you are clear about the screen printing method and its working methodology. We hope you can select the right printer, like Epson Expression XP-15000 13″ Inkjet Colour Printer, as per your need.This product is equipped with all the necessary features required for this process.
Mark Bryant is a highly experienced and knowledgeable printer review expert, with an impressive track record of accurately evaluating the performance of printing products. He is passionate about understanding the nuances between models and brands, so that his readers can make informed purchasing decisions.
We use cookies to ensure that we give you the best experience on our website. If you continue to use this site we will assume that you are happy with it.Ok